

6 Steps to make an outdoor notice board
Creating an outdoor notice board is an excellent way to communicate important information, whether for a community, school, workplace, or public space. A well-designed outdoor notice board can withstand the elements while providing a clear, organized display of information. In this guide, we'll walk you through the steps to make an outdoor notice board, from choosing materials to installation, with a focus on durability and functionality.
Table of Contents
- Introduction to Outdoor Notice Boards
- Why You Need an Outdoor Notice Board
- Materials Needed for Making an Outdoor Notice Board
- Step-by-Step Guide to Making an Outdoor Notice Board
- Common FAQs About Outdoor Notice Boards
- Conclusion
- Comparison Table: Key Features of Outdoor Notice Boards
Introduction to Outdoor Notice Boards

Outdoor notice boards are essential fixtures in many public and private spaces. They provide a dedicated area for displaying important announcements, advertisements, or community news. Unlike indoor boards, outdoor notice boards must be designed to withstand various weather conditions while maintaining the integrity of the displayed materials.
Why You Need an Outdoor Notice Board
Outdoor notice boards serve several purposes, including:
- Community Engagement: They help keep community members informed about events, meetings, and other important notices.
- Workplace Communication: Businesses use outdoor notice boards to share safety information, schedules, or updates with employees.
- Educational Institutions: Schools and universities can display academic schedules, event information, or emergency notices.
- Public Spaces: Parks, libraries, and other public areas use notice boards to inform visitors about rules, events, and local news.
Benefits of a Lockable Outdoor Notice Board
- Security: A lockable notice board protects displayed information from tampering or unauthorized removal.
- Weather Protection: Lockable boards with rubber seals keep water, dust, and debris away from the notices.
- Durability: Made with robust materials, these boards are built to last even in harsh weather conditions.
Materials Needed for Making an Outdoor Notice Board
Before you start building your outdoor notice board, gather the following materials:
-
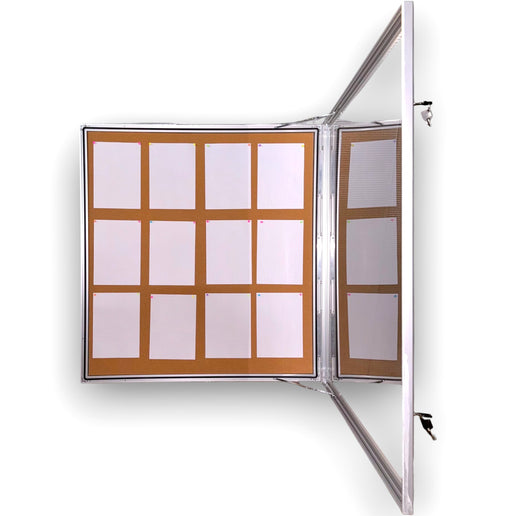
12xA4 Lockable Notice Board (like the one described):
- Rubber seal edge for all-weather use
- Twin gasket to support the frame when open or closed
- Corkboard or pin board surface inside for easy display of information
- Keys and locks for security
- Screws and wall anchors for installation
- Wooden or aluminum frame (depending on your preference)
- Weatherproofing materials (e.g., sealant, weatherstripping)
- Drill and screwdriver
- Measuring tape
- Level
- Protective gloves and eyewear
Step-by-Step Guide to Making an Outdoor Notice Board
1. Choosing the Right Board Material
The first step in making an outdoor notice board is selecting the right material. Consider the following options:
- Corkboard: Ideal for pinning notices, cork is durable and easy to replace.
- Magnetic board: If you prefer to use magnets instead of pins, a magnetic surface is an excellent choice.
- Chalkboard or whiteboard: For erasable notices or messages, these surfaces are versatile and reusable.
Given the example provided, a corkboard is recommended for ease of use and durability.
2. Constructing the Frame
The frame of your notice board must be sturdy and weather-resistant. Here’s how to construct it:
- Measure and cut the frame pieces: If you’re using wood or aluminum, cut the pieces according to the size of your board. Ensure the cuts are precise for a snug fit.
- Assemble the frame: Use screws or nails to secure the corners of the frame. If you’re using aluminum, consider using corner brackets for added strength.
- Attach the frame to the board: Place the board inside the frame and secure it using screws or strong adhesive. Ensure the board is centered and secure.
3. Weatherproofing Your Notice Board
Weatherproofing is crucial for outdoor notice boards to protect against rain, wind, and sun damage.
- Apply a sealant: Use a clear waterproof sealant to coat the frame and edges of the board. This will prevent water from seeping in and damaging the materials.
- Add weatherstripping: Attach weatherstripping along the edges of the frame where the cover meets the board. This ensures a tight seal when the cover is closed.
- Install a rubber gasket: If your notice board doesn’t already have one, install a rubber gasket to create an all-weather seal around the cover.
4. Installing the Cork or Pin Board Surface
Now it’s time to install the cork or pin board surface inside the frame:
- Measure and cut the corkboard: Ensure it fits perfectly within the frame.
- Attach the corkboard: Use strong adhesive or double-sided tape to secure the corkboard to the back panel of the frame. Press firmly to ensure a good bond.
5. Adding a Lockable Cover
A lockable cover protects your notices from unauthorized access and weather damage:
- Install hinges: Attach hinges to the top of the frame, ensuring they are evenly spaced and aligned.
- Attach the cover: Secure the cover to the hinges, ensuring it opens and closes smoothly.
- Install the lock: Attach the locking mechanism to the cover and frame. Ensure the lock aligns properly with the keyhole for easy access.
6. Mounting the Notice Board
Finally, mount the notice board to your chosen location:
- Choose a suitable location: Select a spot that is easily visible and accessible to your intended audience.
- Mark the mounting points: Use a level to mark the points where the screws will go.
- Drill holes and insert anchors: Drill holes into the wall and insert wall anchors to ensure a secure fit.
- Mount the board: Use screws to attach the notice board to the wall, ensuring it is level and secure.
Common FAQs About Outdoor Notice Boards
1. How do I maintain an outdoor notice board?
Regular maintenance includes cleaning the surface, checking the seals for wear, and ensuring the locks function properly. If the board is exposed to direct sunlight, consider using UV-protective coatings to prevent fading.
2. Can I use any type of corkboard for outdoor use?
Not all corkboards are suitable for outdoor use. Choose a high-density corkboard designed to withstand humidity and temperature changes. Ensure it is well-sealed to prevent moisture damage.
3. How do I protect my notices from fading or damage?
To protect your notices, use laminated paper or weatherproof document covers. Ensure the board is placed in a shaded area or has a UV-resistant cover to prevent sun damage.
Final Toughts
Creating an outdoor notice board is a rewarding project that provides a practical solution for displaying important information in public spaces. By following the steps outlined in this guide, you can construct a durable, weatherproof notice board that will serve your community or organization for years to come. Whether you're making a board for a school, workplace, or public area, the key is to use high-quality materials and ensure proper installation.
Comparison Table: Key Features of Outdoor Notice Boards
| Feature | Description | Importance |
|---|---|---|
| Weatherproofing | Full rubber seal edge, twin gasket for all-weather protection | Protects against weather damage |
| Lockable Cover | Assembled with keys and locks for security | Prevents unauthorized access |
| Corkboard Surface | Pin board surface for easy display of information | Allows for easy updates and changes |
| Size and Capacity | Fits 12xA4 papers in portrait orientation | Suitable for displaying multiple notices |
| Mounting Hardware | Comes with keys and screws for secure installation | Ensures stability and security |
| Frame Material | Options include wood, aluminum, and high-strength plastic | Affects durability and aesthetics |
| UV Protection | Optional UV-resistant coatings | Protects notices from sun damage |
| Accessibility | Hinged cover for easy access | Allows quick and convenient updates |
Creating a high-quality outdoor notice board is an investment in effective communication and community engagement. By following this guide, you'll be well-equipped to build a notice board that meets your specific needs and stands the test of time.